Guide: How to Work with BAN Profiles in FNM Manager
BAN Profiles in FNM Manager allow you to configure different actions and parameters that are automatically executed when triggered by a Host Group or Customer during an attack. When FastNetMon detects an attack, it applies the respective action related to the IP address or Host Group involved. Requires PRO License.
Create or Edit a BAN Profile
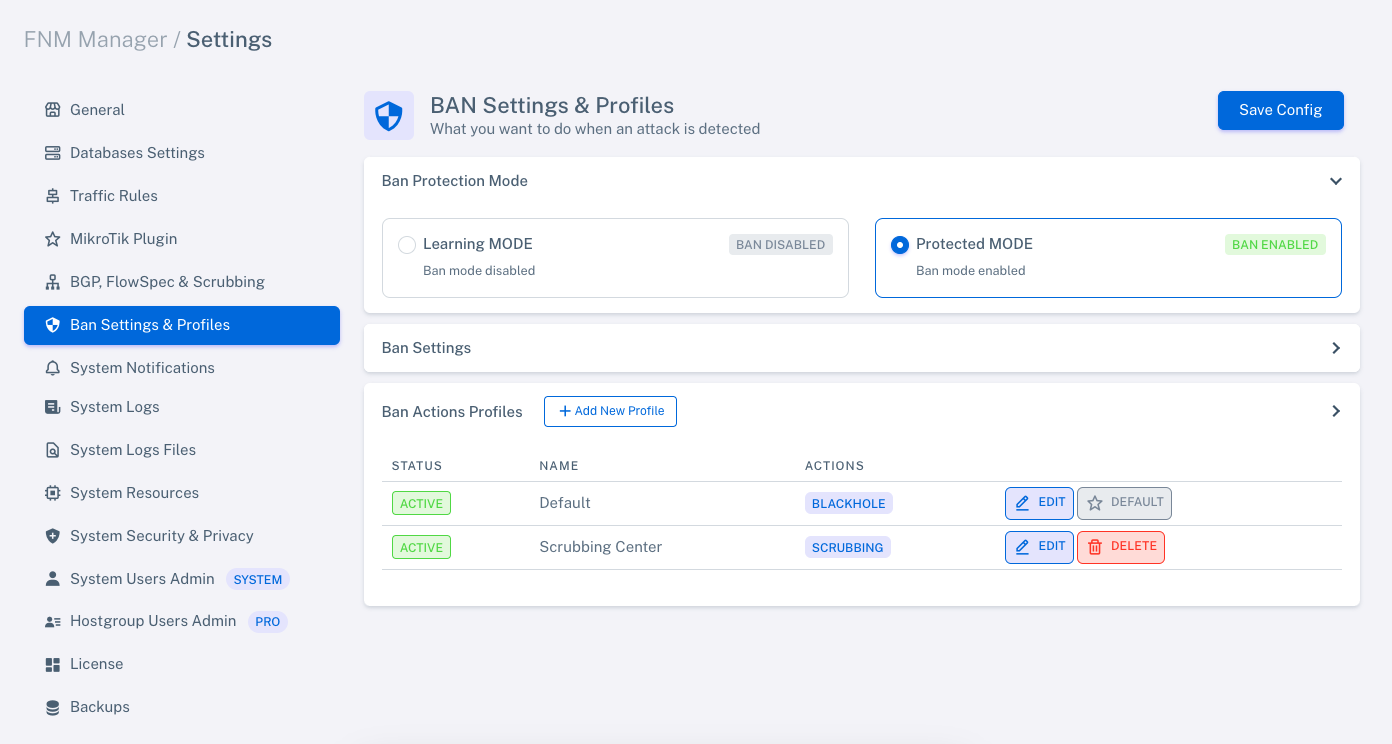
Accessing the BAN Profiles Configuration
-
From the main menu, navigate to Settings > Ban Profiles.
-
Create a new profile or edit an existing one. Once the profile is created, you can associate it with Customers from their respective configuration.
Configuring BAN Profile Parameters
-
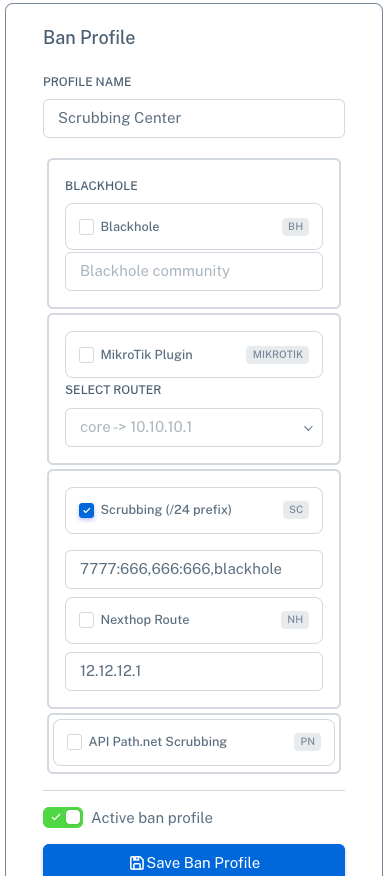
Profile Name:
- Assign a descriptive name to the profile (e.g., "Default", "High Severity Scrubbing").
-
Blackhole:
-
Enable this option if you want to use this action. Publishes the IP Address with a /32 mask.
-
Specify the related community (e.g.,
666:666).
-
-
MikroTik Plugin:
-
Connect FNM Manager to one or more MikroTik routers using their API.
-
Select the routers to connect when applying this profile.
-
This action will add the attacked IP to an address-list on the MikroTik router for further processing.
-
-
Scrubbing:
-
Publish the network with a /24 mask that is being attacked.
-
Specify one or more associated communities (e.g.,
7777:666,666:666,blackhole).
-
-
Next Hop:
-
Configure the Next Hop for the /24 masked route to be published.
-
Enter the Next Hop IP address (e.g.,
12.12.12.1).
-
-
Activate the Profile:
- Ensure the profile is activated by toggling the respective switch.
-
Click Save Ban Profile to save the changes.
Associating a BAN Profile with a Customer or Host Group
-
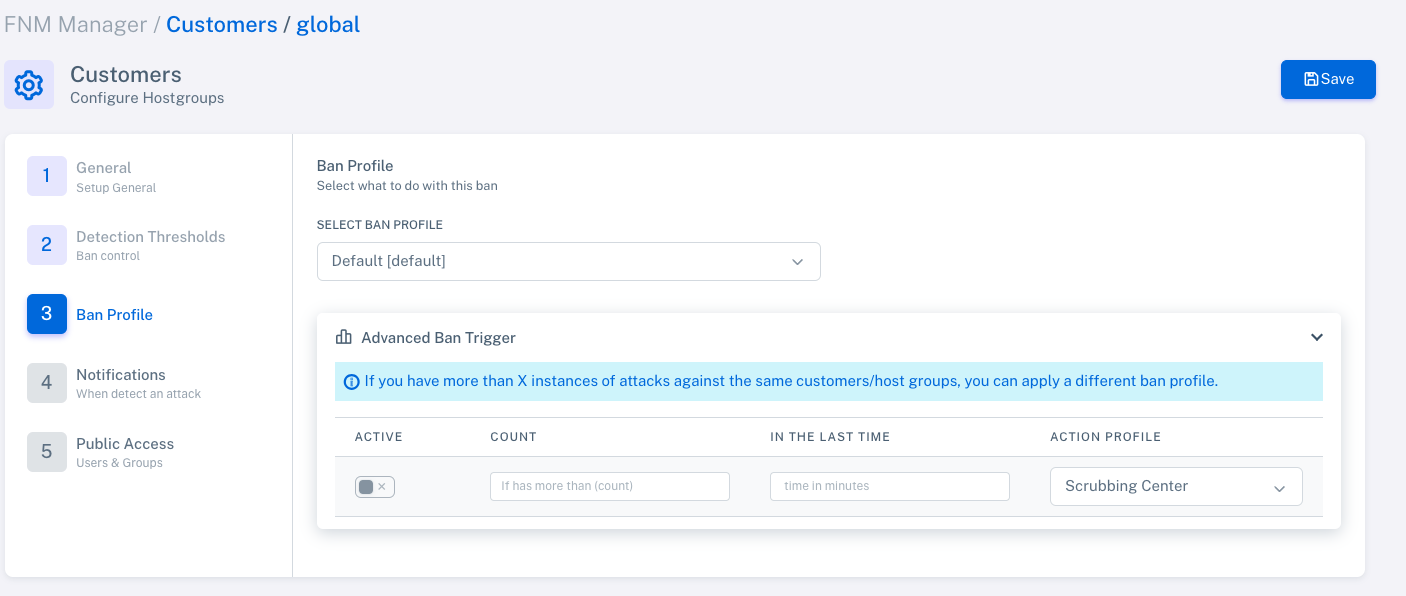
From the Customers tab, select a Customer or Host Group.
-
Navigate to the Configure tab and then to 3) Ban Profile to link the desired profile to the Customer or group.
-
Optionally, enable the Advanced Ban Trigger to define an advanced condition:
-
Specify the number of attacks (COUNT) that must occur within a defined time interval (in minutes).
-
Define which alternate profile will be applied when these conditions are met.
-
-
Save the changes by clicking Save.
Advanced Features
Using the Advanced Ban Trigger
The Advanced Ban Trigger automates profile switching based on the number and frequency of attacks:
- Example: If a host receives more than 5 attacks in the last 10 minutes, the profile can switch from "Default" to a higher severity profile like "Scrubbing".
Creating Multiple Profiles
You can create as many profiles as needed to cover different attack scenarios. Once created, you can assign them to each Host Group or Customer as required. For example:
-
Apply scrubbing through Scrubbing Center to certain Host Groups or Customers.
-
Apply Blackhole or other actions to different Customers based on their needs.
Best Practices
-
Name profiles clearly and descriptively to avoid confusion.
-
Test profiles before applying them in critical environments.
-
Use the Advanced Ban Trigger to automate responses to recurring incidents.
-
Review profiles periodically to ensure they meet your network's current requirements.